Search
Saturday, November 30, 2013
Friday, November 29, 2013
Jaya Jaya Vijayee Raghu Rama
Got a chance to watch a dance show called Jaya Jaya Vijayee Raghu Rama... It was Ramayana narrated through songs and dance...
We loved it! Glad we got a chance to watch it... Amazing sets...
Beautiful choreography... melodious voice...
They even put up a screen giving the english translation of the song that was being sung. We thoroughly enjoyed it... felt good even in those emotional moments...
Thursday, November 7, 2013
Double Rainbow!
One of those rare sights... a double rainbow...
Praneeth and Nandini calling us at the same time to V and me on our cell phones...
Asking us to look out of our window... to enjoy the beautiful sight...
Thanks to the two of them... else we would have missed this nature's beauty...
Finding some treasures are... as simple as opening the window or looking into the sky...
We just need to keep our eyes open...
Probably nose too.. :)
To take in the smell of wet earth when the first rain drops fall onto the dry land...
How about keeping the ears open as well...
To listen the birds calling out to each other...
or to hear the splash of the waves at the beach...
Nature never stops to amaze me...
Wednesday, November 6, 2013
Less than Traditional...
My first visit to a Quilt festival happened in September... I was so excited... I did not know what to expect... But wanted to attend at least a couple of free classes/sessions there...
This festival happened in the Fairgrounds, Pleasanton. It was Quilt, Craft and Sewing festival... I enjoyed looking at all those fabulous quilts, bought a couple of yards of fabric and signed up for the raffle prize. :)
Got a chance to learn a new technique in quilting called "Less than Traditional". This was a quilting technique invented by a person named Charlie. Click here to know more.
As soon as I got back home, I rushed to try out this technique. The results are here... :)


Tuesday, November 5, 2013
Monday, November 4, 2013
Sunday, November 3, 2013
Saturday, November 2, 2013
Friday, October 11, 2013
Thursday, October 10, 2013
Bulls bridge
This is a 19th century bridge in Kent, Connecticut.
It connects two states: Connecticut and New York.
It is over Housatonic River.
It has little openings to get a view of the river
An inside view of the bridge...
We went down a trail to wet our feet in the river :)
In the below photo,notice how calm the water is before it hits those rocks... It almost looks still...
Wednesday, October 9, 2013
Tuesday, October 8, 2013
October 8th
Phew! The parcel reached them on their day. It was the one to witness their smiles while they unpacked it. Two little pouches for my two little sisters!
Wish you a very Happy Birthday my darling sisters!
All the while I made these, I was imagining their faces when they would open the package to see these pouches... It is indeed a pleasure to make our loved ones happy! :)
All sewed with love and care...
I cut all the pieces using my Sizzix bigshot machine. The pouch body is fleece and the flowers in felt. The star button to add beauty to the flower.
Stitched a couple of button holes and passed the grosgrain ribbon through it, then tied it into a bow.
Simple, yet beautiful... Just like my sisters! :)
What started out as a cell phone pouch... ended as a pouch to be used for saving trinkets! But what's important is it reached them on their birthday... Thank you USPS!
Monday, October 7, 2013
Sunday, October 6, 2013
Wednesday, September 25, 2013
Quilting Along
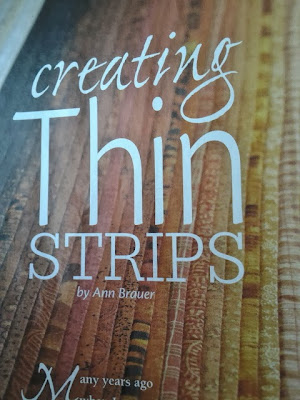
I read an article by name "Quilting Thin Strips" in a quilting magazine.
This quilting technique involves stitching strips of cloth onto batting.
I tried out this technique recently. This is a very good way to use our scrap fabrics.
First cut the batting and backing for required shape. For a small project like this, we can take batting and backing with same size. Also, take thin strips of fabric for the quilt top.
To get the above design,place the first two strips right side together on one diagonal of the rectangle as shown below. Then stitch with 1/4th inch sewing allowance.
Then press/iron them flat.
Add another strip to one end and stitch along.
Continue till the whole batting is covered. Then trim the edges.
Now attach a 1 inch binding tape to edges of the placemat.
Complete the edges.
The placemat is complete now.
This is how the back looks like.
I did a similar placemat by attaching strips vertically.
I am planning to make two more to complete the set. :)
Subscribe to:
Posts (Atom)


