Search

Thursday, February 23, 2012

Craftsy

I am lucky to have chanced upon this website (http://www.craftsy.com).  This is a place where creative people share their crafts, patterns and tutorials. They also have free online courses. I became a member a couple of weeks ago and already have 4 followers! :) It feels good when others appreciate our creativity! :)

I have joined their Quilt block of the month course. (It's free!) I love watching the tutorials; I am yet to try them out. You can also join if you are interested!

Tuesday, February 21, 2012

Quilt using Sizzix Die Squares

I am so excited today. I finished a throw for our niece and it came out very beautiful. This is my first project using my Sizzix Bigshot die cutting machine. This is my first patchwork quilt as well! 


This is how it looks from the front.

Here is a close-up shot.
 

The flip side looks like this.


As I have used fleece as backing material, I have not used any batting for this quilt. All the blue and white squares were part of an unused T-shirt. I cut the squares using Sizzix Bigshot machine with Scallop Square Die. Click below for full tutorial...

Friday, February 17, 2012

Good Old Days - Paavadai

During all our childhood festival days, we were made to wear paavadai preferably pattu(silk) ones. A paavadai is a South Indian traditional dress. It is an ankle length flowing skirt usually in silk with border at the hemline. 

We would twirl around in them. Sometimes, when we twirled and sat, the paavadai would be all puffed up with air and it felt like we were popping out of a balloon!!

Recently, I got a chance to make a paavadai for my friend's daughter for her birthday. Oooohh!!! It brought back all my childhood memories. Here are some pictures of the paavadai. I was so excited that I took a lot of them! :)

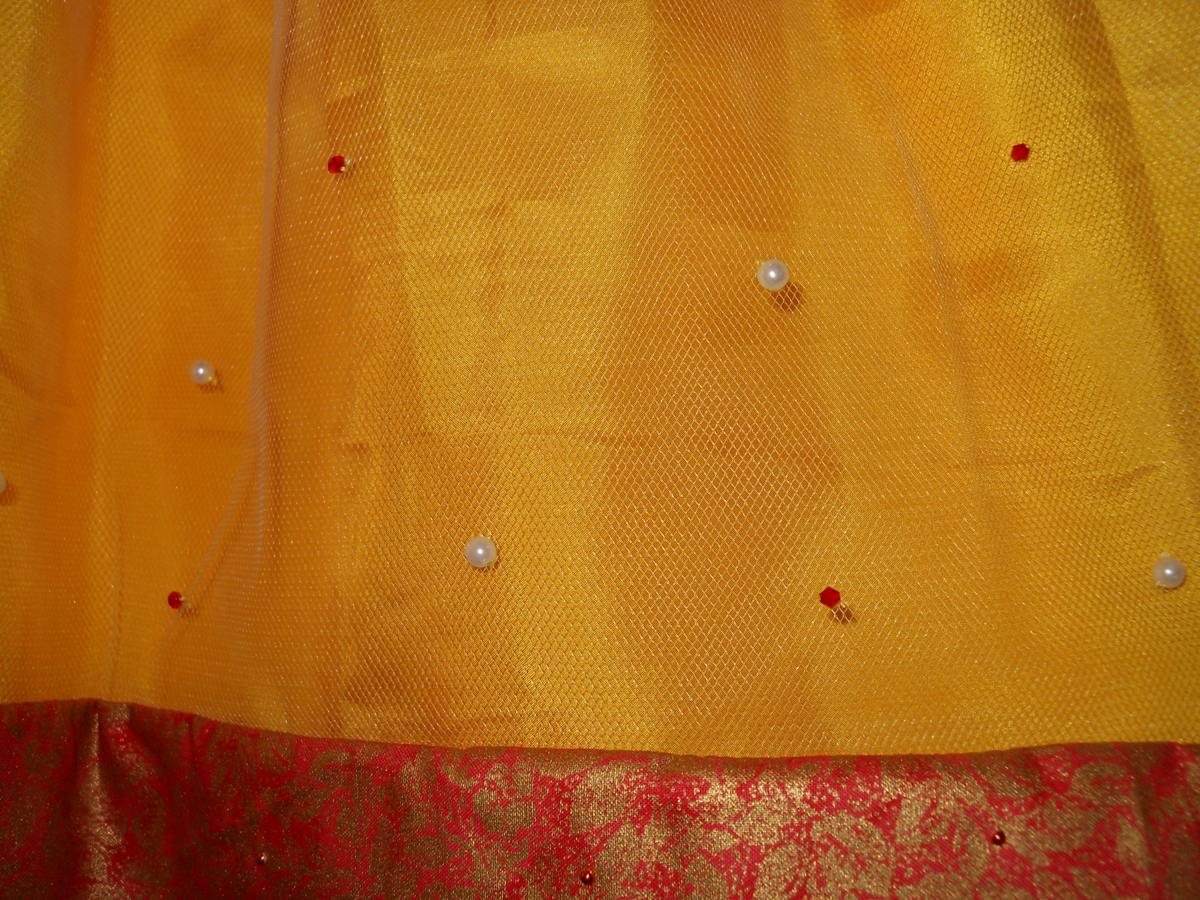
I embellished the paavadai with some pearls and crystal beads

I hot ironed some rhinestuds to the border. The paavadai is made of two layers. The outer layer is of mesh fabric and the inner layer is of yellow silk.

The chokka (blouse) matches with the border of the paavadai. I hot ironed rhinestuds on the chokka.

The chokka has puffed sleeves.

I love it! Wish I could go back to my childhood days and wear this one! ;-)

I hope the birthday baby likes it too! :-)

Sunday, February 12, 2012

Fabric Box/Liner Making - Simpler Way

Remember the last time I tried making Fabric boxes? Making one box took most of my Sunday afternoon. I badly needed a simpler and faster way to make them. Why this obsession with fabric boxes? I really don't know. I need them for storing my fabric, yarn and other craft stuff.

This is more a fabric liner than a fabric box. 

Time to jump right into the tutorial...

I took a 12 X 14 X 8 cardboard box

Placed it on a fabric to cut the bottom rectangle. The bottom fabric should measure  one inch more than the bottom of the box. For me, I took a 13 X 15 fabric rectangle.

For making the sides of the box, take a strip of cloth 5 inches more than the height of the box. I took 13 inch strip of fabric of length 54 inches . The length of the strip should be 2(LENGTH + WIDTH + 1) inches

Join fabric strip to the bottom rectangle as shown below (Sorry for the rough sketch)
After stitching, the fabric cover's height will be more than the height of the box. The extra height helps to wrap it over the edges of the box. It fits snugly. I like it!

I glued colourful paper to the cardboard box and then covered the insides of the box with the fabric liner.

These are so quick to make and I can always toss the liner in the washer if it becomes dirty. They are re-usable too! I love them! :)